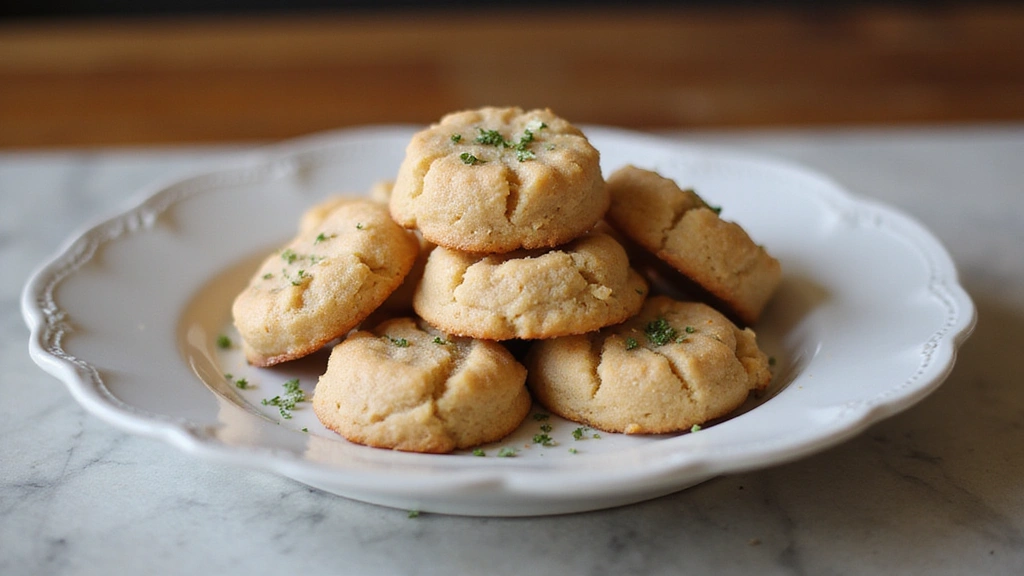
There’s something irresistibly comforting about a warm, freshly baked peanut butter cookie.
The rich, nutty flavor combined with a soft, fluffy texture makes these cookies a timeless delight for all ages.
I remember baking these with my grandmother during the summer, filling the kitchen with sweet aromas and laughter.
Whether you’re indulging in a sweet treat after dinner or enjoying a midday snack, these easy peanut butter cookies are quick to make and simply delicious.
The History and Cultural Significance
• Peanut Butter Cookies trace their origins to the United States in the early 20th century, where they gained popularity during the rise of peanut butter as a staple ingredient.
• The dish evolved over decades as home bakers experimented with different ratios of sugar, flour, and peanut butter, eventually becoming the beloved version we know today.
• In American culture, these cookies traditionally appear at family gatherings, bake sales, and holiday celebrations, symbolizing comfort and togetherness.
• While many variations exist across different regions, the authentic version maintains its signature peanut butter flavor and soft texture that sets it apart from imitations.
Recipe Overview
Nutritional Information (per serving)
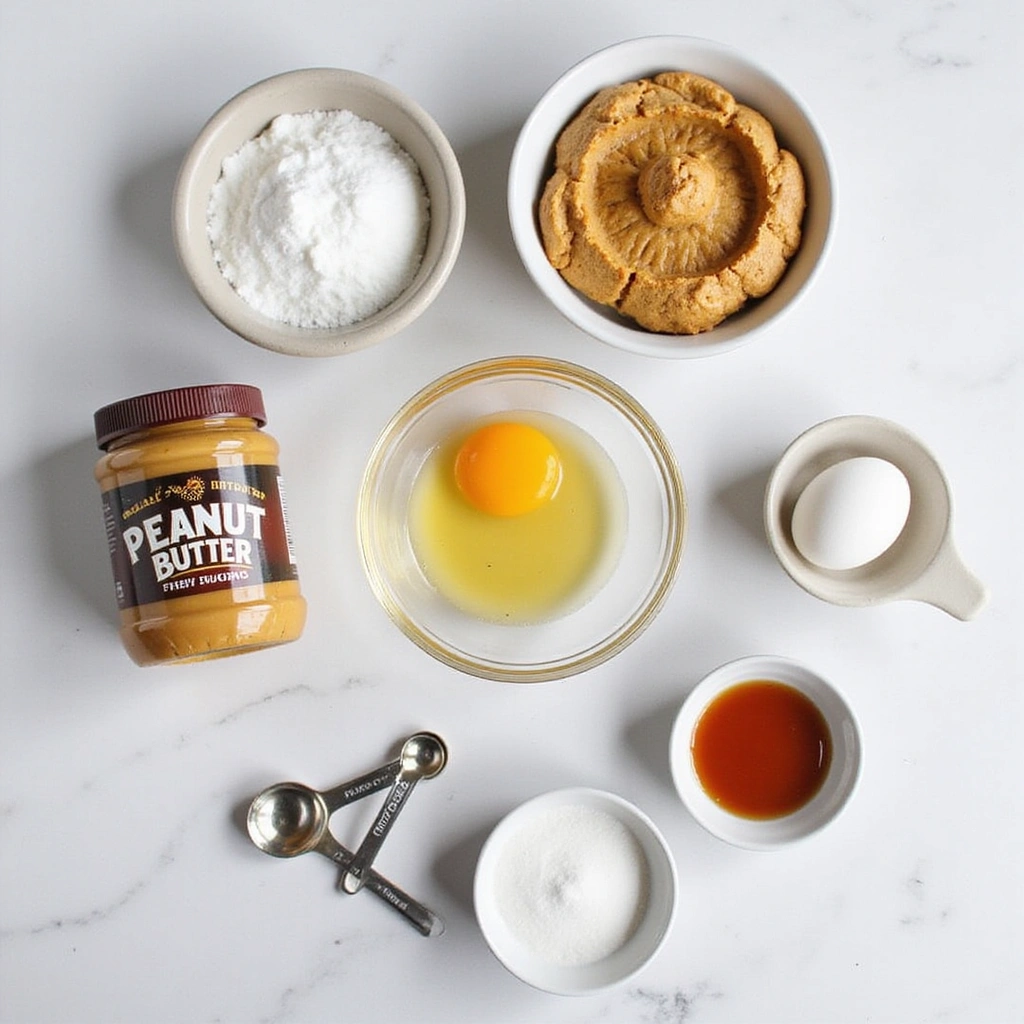
Ingredients
Essential Equipment Guide
Mixing Bowl: A sturdy mixing bowl is essential for combining ingredients evenly. Look for a bowl that is large enough to allow for thorough mixing without spilling. Glass or stainless steel bowls are preferable as they don’t retain odors and are easy to clean.
Baking Sheet: A good quality baking sheet ensures even heat distribution, which is crucial for baking cookies. Opt for heavy-duty, non-stick sheets. If unavailable, parchment paper can be used to prevent sticking.
Measuring Cups and Spoons: Accurate measurements are vital for cookie recipes. Invest in a set of dry and liquid measuring tools for best results. Make sure they are clearly marked for easy use.
Preparation Methods
Creaming: This technique involves mixing the peanut butter and sugar until smooth and light. It incorporates air into the mixture, contributing to a fluffy texture. Use an electric mixer on medium speed for best results.
Measuring: Accurate measuring is crucial for baking success. Use the appropriate measuring cups or spoons for dry and liquid ingredients. Level off dry ingredients with a straight edge for precision.
Scooping: When shaping the cookie dough, use a cookie scoop or spoon to ensure uniform sizes. This helps the cookies bake evenly. Dip the scoop in flour if the dough is sticky.
Step 1: Prepare Ingredients
Gather all your ingredients and measuring tools before beginning.
This ensures a smooth cooking process without interruptions.
Make sure to measure the peanut butter, sugar, egg, vanilla, and baking soda accurately.
Having everything ready will help you follow the recipe more effectively.
Step 2: Preheat the Oven
Preheat your oven to 350°F (175°C).
This step is crucial for achieving the perfect cookie texture.
While the oven heats up, you can prepare the cookie dough.
A properly preheated oven ensures even baking from the start.
Step 3: Mix Peanut Butter and Sugar
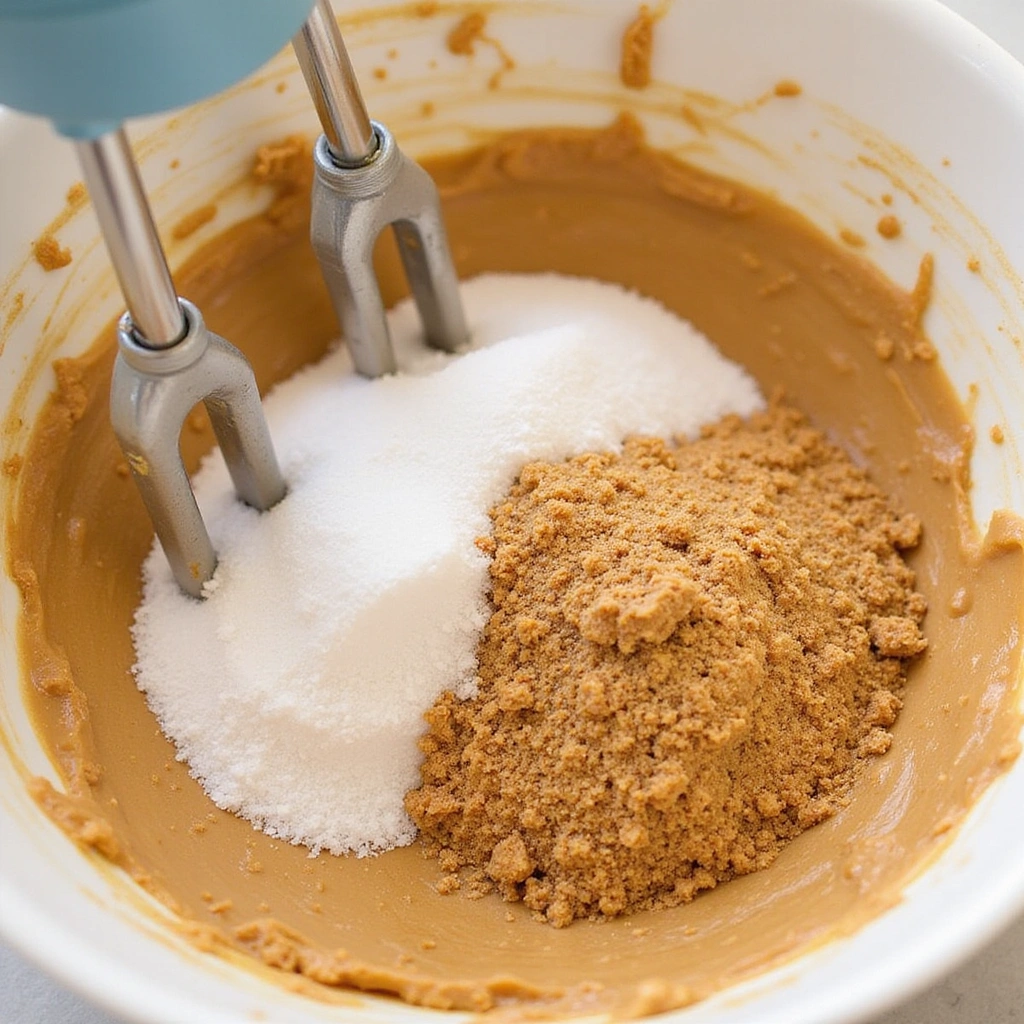
In a large mixing bowl, combine the peanut butter and granulated sugar.
Using an electric mixer, beat the mixture on medium speed until smooth and creamy.
Look for a light texture with no lumps for the best results.
This process usually takes about 2-3 minutes.
Step 4: Add Egg and Vanilla
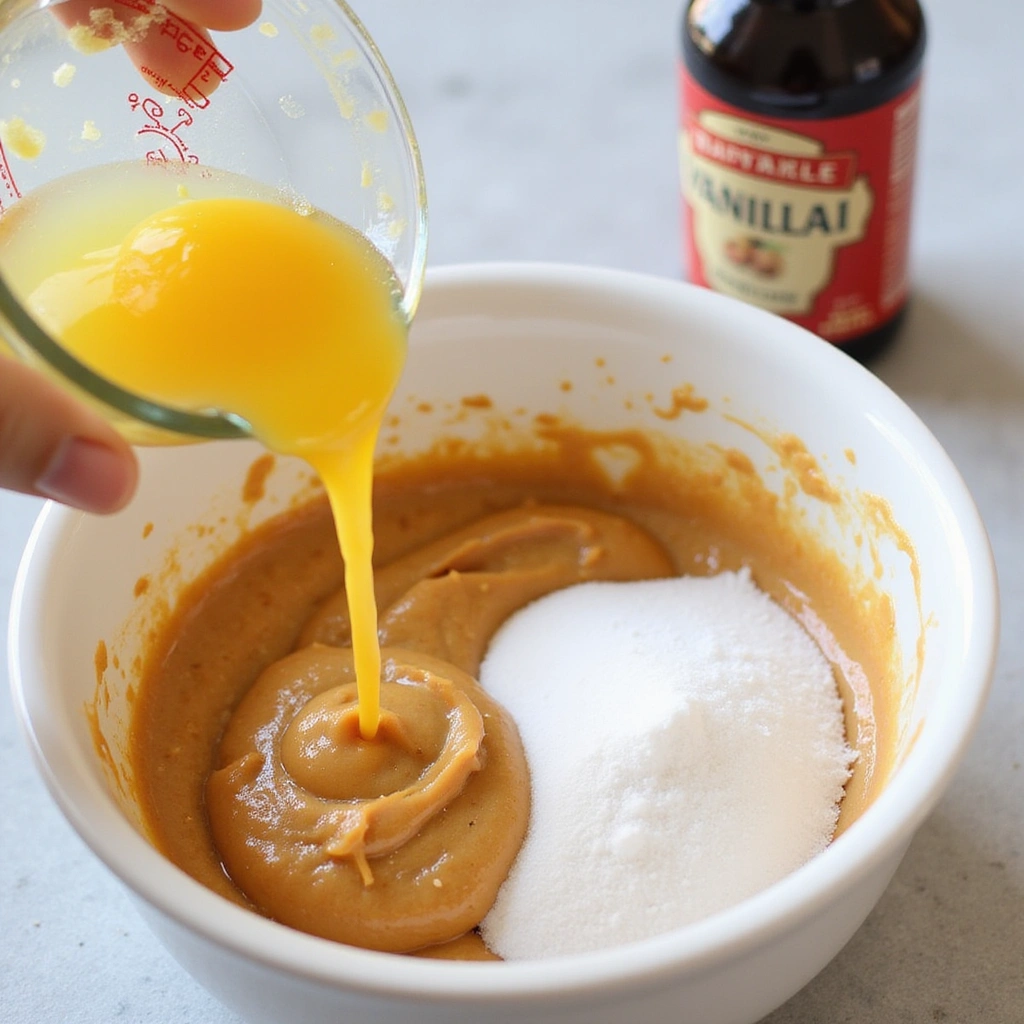
Crack the egg into the peanut butter and sugar mixture.
Add the vanilla extract as well.
Mix on medium speed until the mixture is fully combined and creamy.
This should take about 1-2 minutes.
Step 5: Incorporate Baking Soda
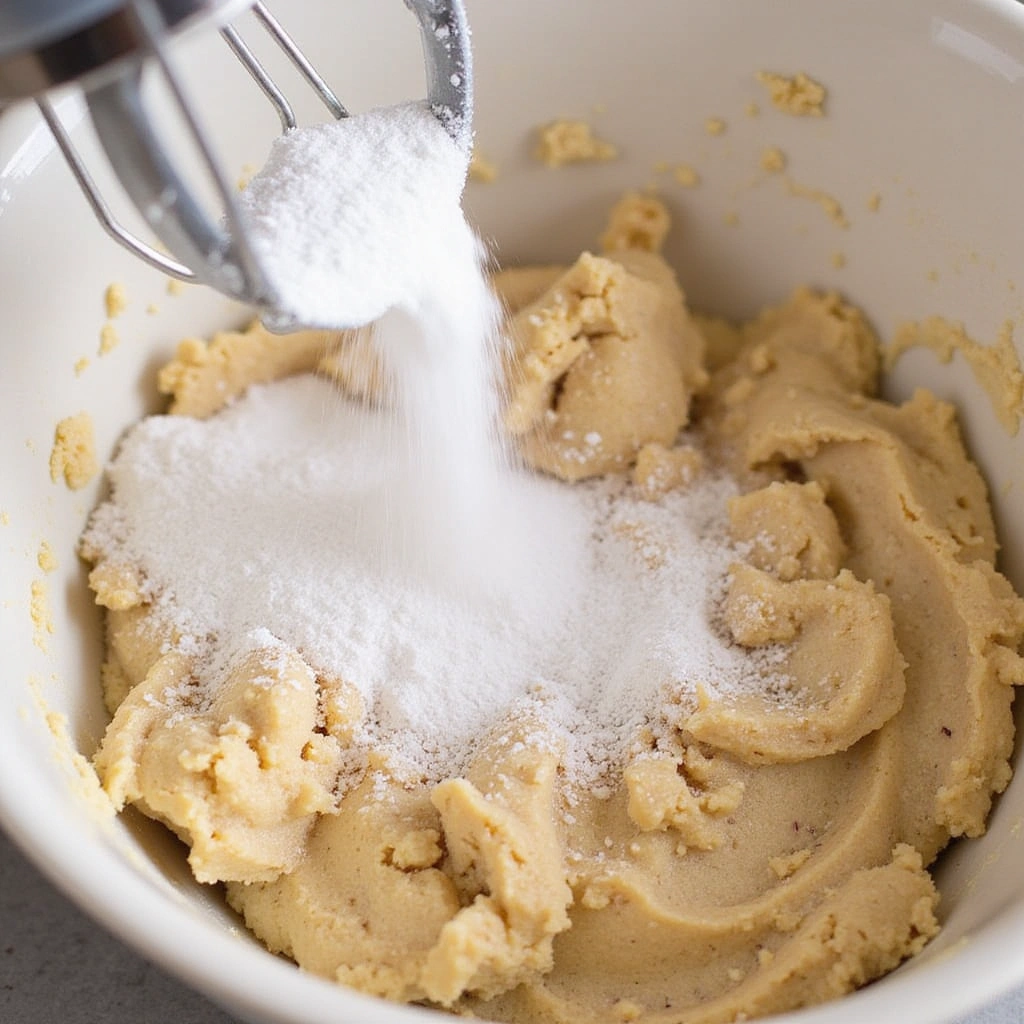
Sprinkle the baking soda over the cookie dough mixture.
Mix on low speed until the baking soda is fully incorporated.
This helps the cookies rise and become fluffy during baking.
Ensure there are no visible clumps of baking soda.
Step 6: Scoop the Dough

Using a cookie scoop or tablespoon, scoop the dough onto a prepared baking sheet.
Space each ball of dough about 2 inches apart to allow for spreading.
Make sure the scoops are uniform in size for even baking.
Aim for about 1 tablespoon per cookie.
Step 7: Flatten the Cookies
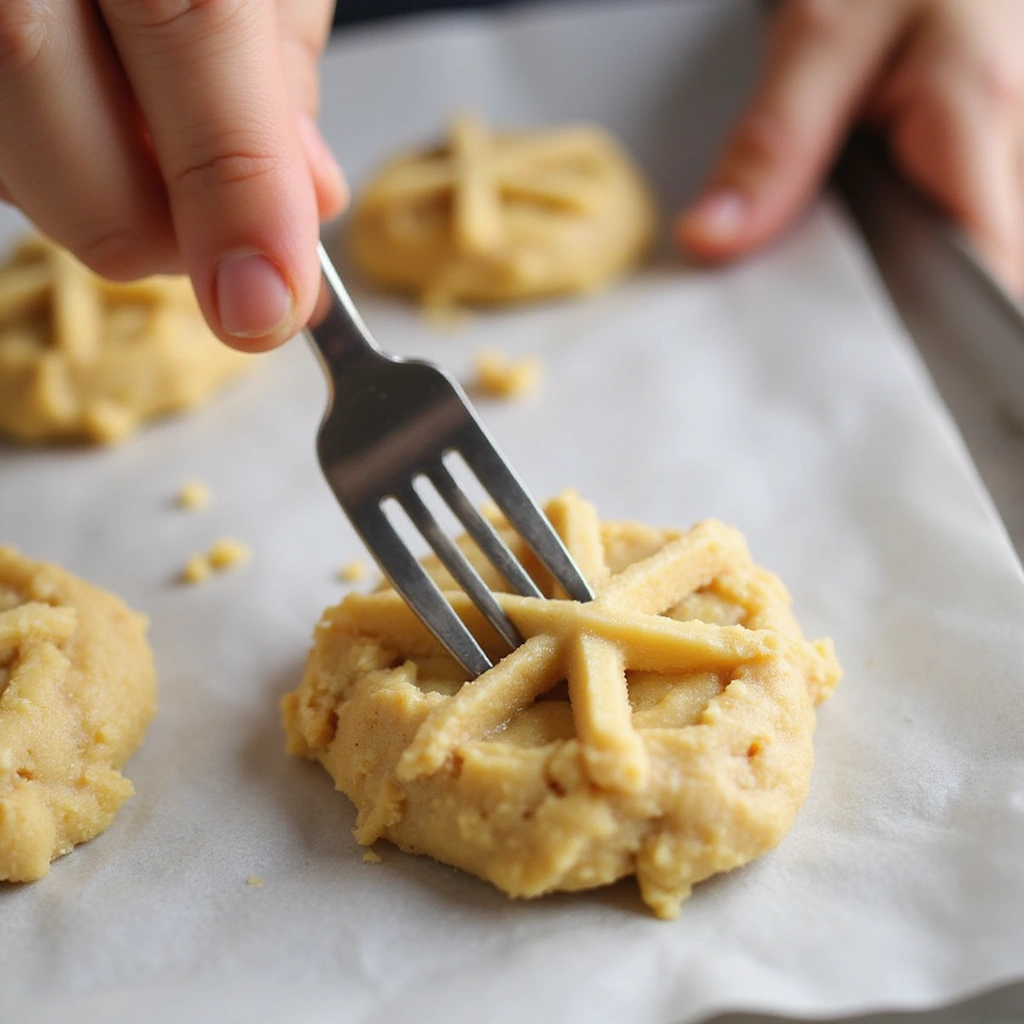
Using the back of a fork, gently press down on each cookie ball to flatten it slightly.
This creates the classic crisscross pattern on top of the cookies.
Be gentle to avoid overly compressing the dough.
This step also helps ensure even baking.
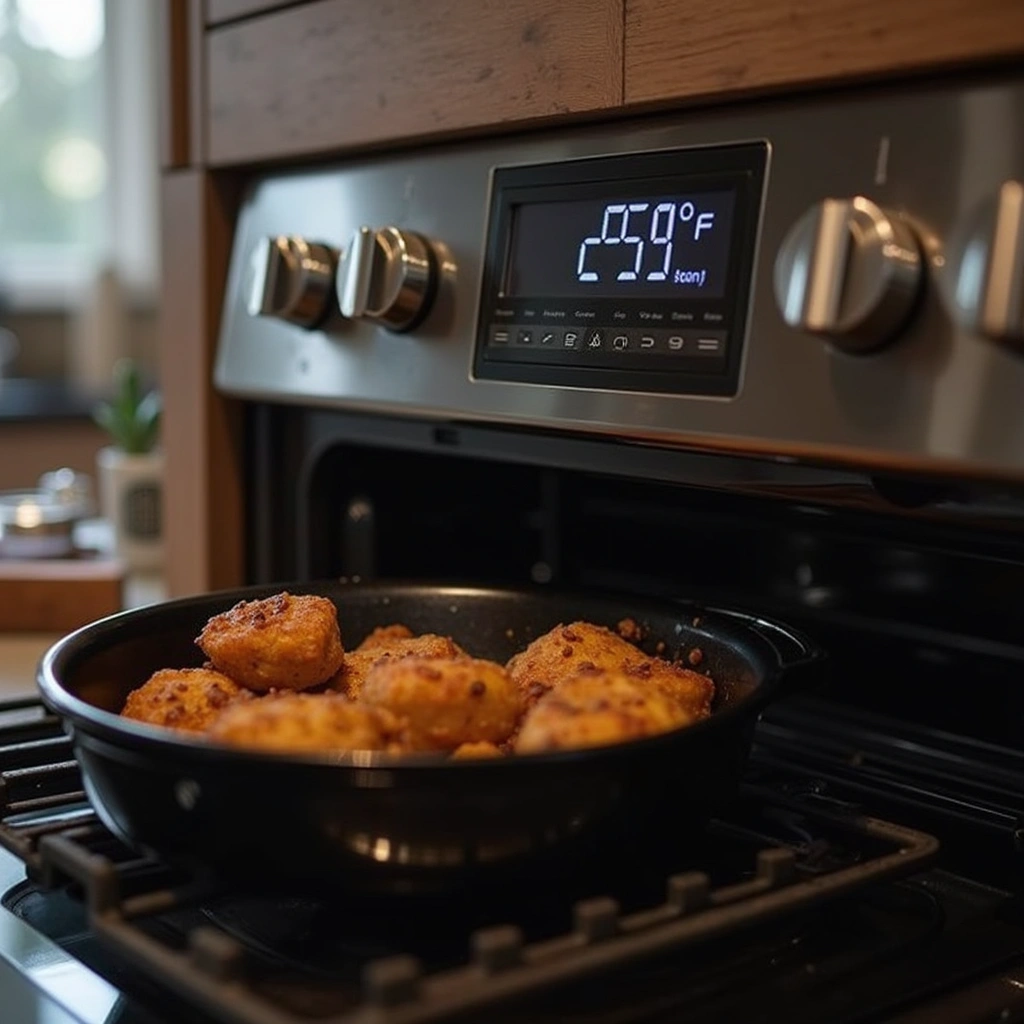
Step 8: Bake the Cookies
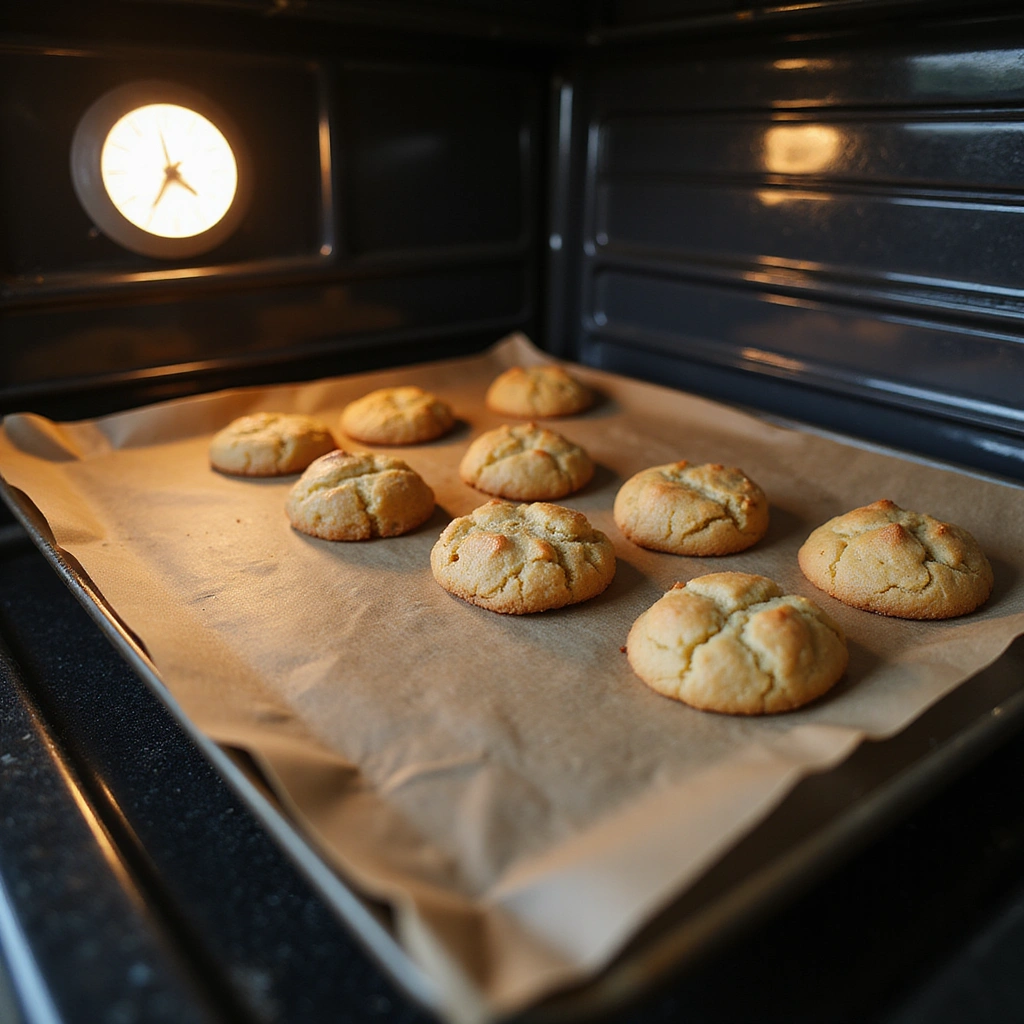
Place the baking sheet in the preheated oven.
Bake for 10 minutes, or until the edges are lightly golden.
Keep an eye on them, as they can quickly overbake.
Remove them from the oven before they look fully done, as they will continue to cook on the sheet.
Step 9: Cool the Cookies
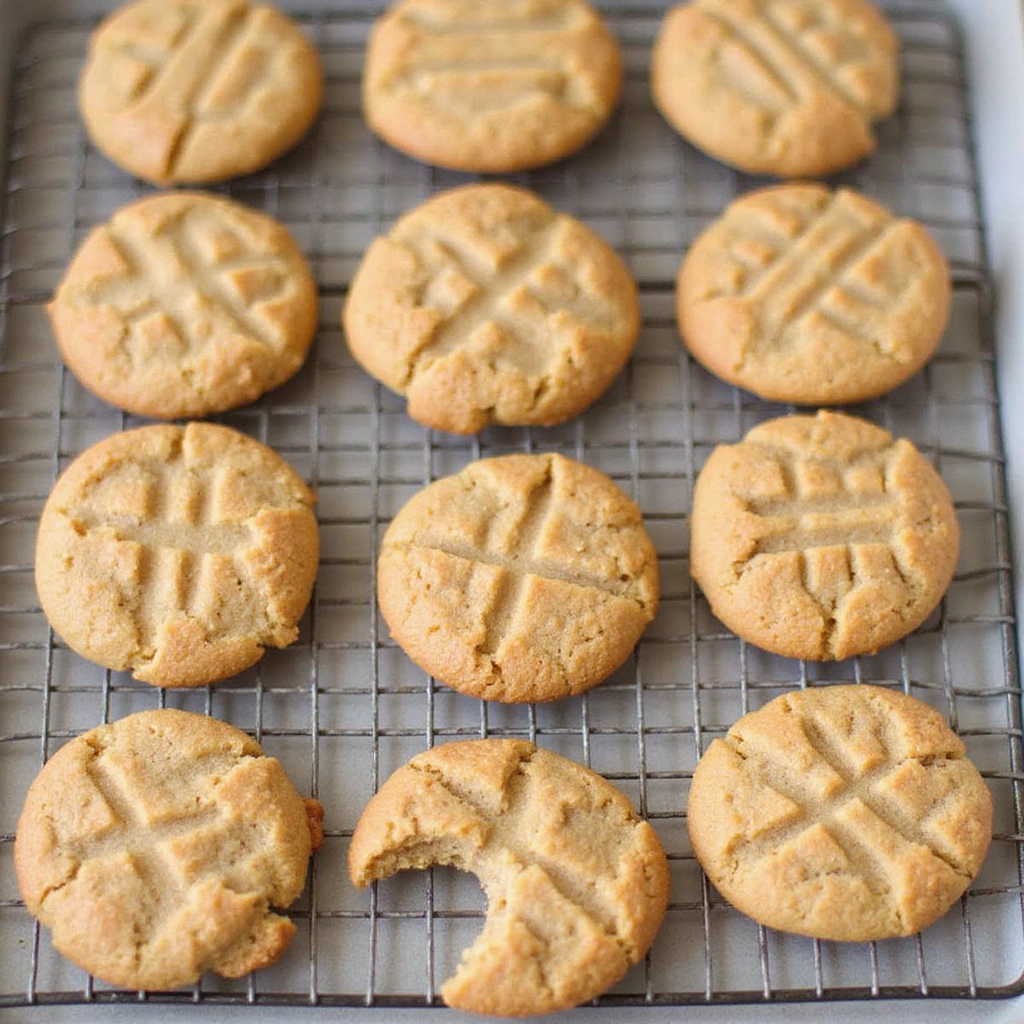
Allow the cookies to cool on the baking sheet for about 5 minutes.
This helps them set before transferring them to a wire rack.
Watch for them to firm up slightly during this time.
Afterward, move them to a wire rack to cool completely.
Step 10: Enjoy!
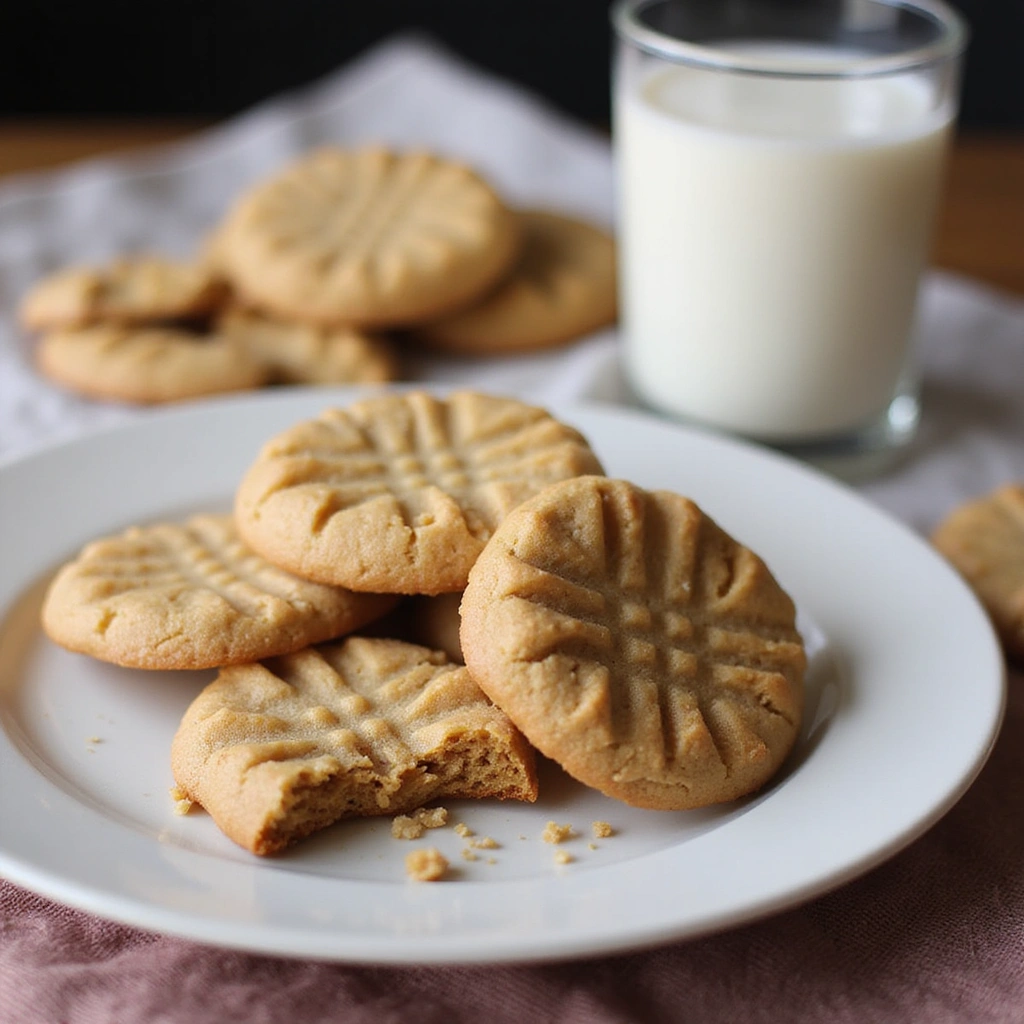
Once cooled, your peanut butter cookies are ready to be enjoyed.
Serve them with a glass of milk or your favorite beverage.
Feel free to store any leftovers in an airtight container.
These cookies make for a delightful snack any time of day.
Critical Timing and Temperature Guide
Baking Time: Bake the cookies for 10 minutes at 350°F (175°C). Look for the edges to turn golden and the centers to appear set but soft. Avoid overbaking, as cookies will harden as they cool.
Cooling Time: Allow cookies to cool for 5 minutes on the baking sheet before transferring. This step is essential to prevent them from breaking apart.
Storage Temperature: Store cookies at room temperature in an airtight container. They can last up to a week, but for longer freshness, consider refrigerating them.
Pro Tips for Peanut Butter Cookies
• Ingredient Selection: Use natural peanut butter without additives for the best flavor and texture.
• Preparation Secret: Chill the dough for 30 minutes before baking to prevent spreading and enhance texture.
• Temperature Management: Ensure ingredients are at room temperature before mixing for better incorporation.
• Texture Enhancement: For a chewier cookie, slightly underbake them and allow them to cool completely on the baking sheet.
• Flavor Layering: Add a pinch of sea salt on top before baking for a flavor contrast.
• Make-Ahead Strategies: Dough can be frozen in balls and baked directly from the freezer, adding a minute to the baking time.
• Restaurant-Quality Finishing Touches: Drizzle melted chocolate over cooled cookies for an elegant touch.
• Equipment Optimization: Use non-stick baking sheets or line with parchment for easy removal.
Troubleshooting Common Issues
• Cookies Too Hard: This can happen if they are overbaked. Always remove cookies while they still look a bit underdone and allow them to cool on the sheet.
• Dough Too Sticky: If the dough is too sticky to scoop, chill it in the refrigerator for about 30 minutes to make it easier to handle.
• Uneven Baking: Ensure your oven is properly calibrated. Rotate the baking sheet halfway through baking for even results.
• Flat Cookies: If cookies spread too much, check your measurements and consider chilling the dough before baking.
• Flavor Imbalance: If the cookies taste too sweet, consider reducing the sugar slightly next time or adding a pinch of salt to balance the sweetness.
Variations and Regional Differences
• Classic Southern Variation: In the South, peanut butter cookies may be made with added chopped pecans for a nutty crunch.
• Chocolate Chip Twist: Many enjoy adding chocolate chips to the dough for a chocolate-peanut butter combination that’s irresistibly delicious.
• Gluten-Free Option: Substitute regular flour with almond flour or a gluten-free flour blend for those with dietary restrictions.
• Modern Interpretations: Contemporary versions may include ingredients like coconut sugar or natural sweeteners for a healthier take.
Food Science Behind the Recipe
• Maillard Reaction: This chemical reaction occurs between amino acids and reducing sugars during baking, creating the delicious brown crust and complex flavors.
• Emulsification: The blending of peanut butter and sugar creates a stable mixture, preventing separation and ensuring a consistent texture.
• Baking Soda Activation: Baking soda releases carbon dioxide when heated, helping the cookies rise and achieve a light texture.
Frequently Asked Questions
What’s the most common mistake people make when preparing peanut butter cookies? Overbaking is the top mistake; always remove cookies from the oven while they still appear soft in the center.
Can I prepare components of this dish in advance? Yes, you can prepare and refrigerate the dough for up to 3 days or freeze it for up to 3 months.
How do I adapt this recipe for dietary restrictions? Substitute granulated sugar with coconut sugar or use a sugar alternative, and replace the egg with flaxseed meal mixed with water for a vegan option.
What’s the best way to store and reheat leftovers? Store in an airtight container at room temperature for up to a week. To reheat, microwave for 10-15 seconds to restore softness.
Can I freeze this dish? Yes, freeze the baked cookies in an airtight container for up to 3 months. Thaw at room temperature or reheat slightly in the oven.
What wine or beverages pair best with this dish? A glass of milk or a sweet dessert wine like Moscato pairs wonderfully with peanut butter cookies.
How can I scale this recipe up for a crowd? Simply multiply each ingredient by the number of servings needed, and bake in batches accordingly.
What side dishes complement this recipe best? Serve with fresh fruit or ice cream for a delightful contrast to the richness of the cookies.
How do professional chefs elevate this dish for restaurant service? Chefs often serve these cookies warm with a scoop of ice cream or a drizzle of salted caramel sauce.
Serving and Presentation Guide
• Traditional Presentation: Arrange the cookies on a decorative plate, possibly garnished with a sprinkle of sea salt or alongside a small jar of homemade jam.
• Modern Plating Ideas: Stack the cookies vertically on a slate board with a scoop of ice cream on the side for a trendy look.
• Accompaniment Suggestions: Pair with a glass of cold milk or a warm cup of coffee to enhance the flavors.
• Special Occasion Presentation: For celebrations, serve the cookies on elegant platters with seasonal fruits or flowers for a festive touch.
Conclusion
These easy peanut butter cookies are sure to become a favorite in your household.
Their delightful flavor and fluffy texture make them perfect for any occasion.
I encourage you to try making these cookies and share them with loved ones.
Enjoy the process and the sweet results!